Saturday, January 24, 2015

They are the future of food!

When your five year old thinks of his/her favorite food, do chemically-processed and GMO foods come to mind, such as chips, cokes, and candy? If so, why? Have you made it a priority to teach "them" about the lacing of the processed foods that is done to make them addicted? How about shutting down the technology for a while and getting out this spring with them and growing some really awesome foods! Do they know where flour comes from? Or that tomatoes come in more colors than red, as do watermelons? Have they ever tasted a fresh food they grew themselves? It really doesn't take much to invest in their future, giving them the skills and knowledge that will last a lifetime. Don't be afraid to learn with them. Be willing to make mistakes. It does require some time and a little sweat, but it will feed both body and soul. Isn't that how kids spell love anyway? TIME!When my children were younger, I started gardening with them in a backyard of a .25 acre lot. We had no idea how just working together in those days would bring us to where we are now. We grew everything from non-GMO corn, to tomatoes, squash, and melons. We became a family committed to a better way of thinking, eating, and living to keep ourselves healthy and have fun. It evolved as we learned more and more about our modern day food supply and we added in new things a little at a time. We began to go bigger and get more serious with each year, taking new steps toward being more food independent. We made mistakes, and experienced failures but were willing to accept that lots of things can happen when dealing with nature. It's a learning process and every year has been different. We learned to get creative to keep our children interested.
Now every year we grow much of our own foods, put 'em up for the winter, and have sooo many cool experiences no one can take away. We are "growing together"! Memories and skills are being sowed into the gardens of their hearts. We have a history in the garden and while we work, we sing, play, and discover with one another. We often go to school in the garden. We also have history and geography lessons right in the garden. We play "good bug, bad bug" and get a first-hand science demonstration at the same time!
"Where did this tomato plant come from? Where is Lithuania?"
"Is a praying mantis a good bug or bad bug?"
"What about this eggplant? Where did it come from? What kind of beetle is this?"
"Why do we need to water and weed?"
"How do the bee's make honey? So we eat bee throw up?" My children love to say "I love bee throw up!"  The learning is truly endless.
 One of our favorite things to do each winter, is drool over seed catalogs and make a detailed Family Garden Album for each year. We cut out pictures with descriptions and Days To Harvest Info of what we buy and are going to plant, then paste on paper. We slide these pages into a plastic covering and place it in a three ring binder. The kids have an art contest to see who can design the best "Garden Album" cover. Then we slide those into place in front and back of the binder to give that real creative family garden album feel. We fill pages by like-kinds category and label color tabs for each category, ie. tomatoes or corn. Then when its all full of our detailed crops, we will have a treasure of things to look at and info to turn when planning for summer. It gives them something to look forward to before summer and crops are actually here. It really helps when you've forgotten a lot of details about an item and you need to find out, such as when it should be ripening.
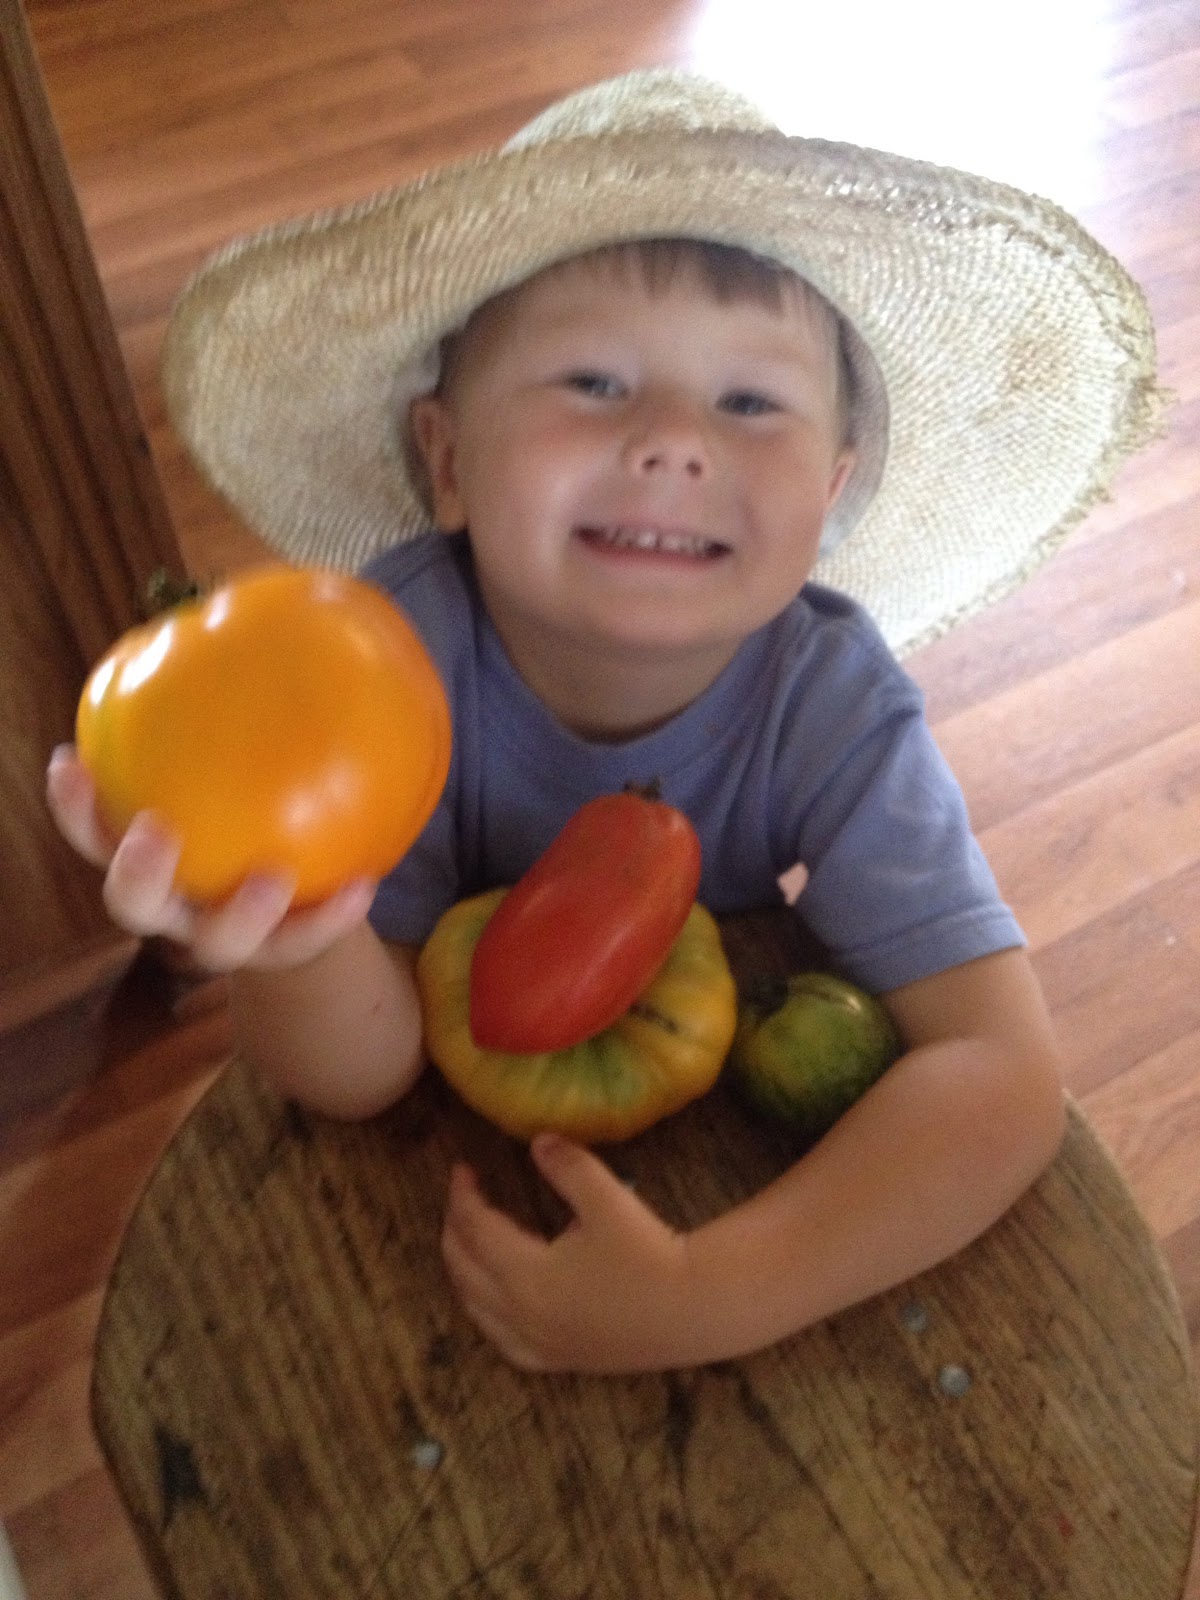
 My son has begun an organic strawberry patch that is giving us fresh fruit, for pennies on the dollar. My littlest girl has (unintentionally) bred a cross tomato that is Orange and weighs 2lbs. My oldest daughter has grown tomatoes from Germany and other places around the world. My other children have tasted the fruits of melons of all shapes and sizes that they helped to grow. What kinds of foods do they speak of or think of? They don't want to eat foods that could cause them potential illness or ruin the health they've been given. They are already concerned for their own food supply. That is an interesting thing. They are learning to "think" about what they eat. From raised beds to fruit trees and bushes, it's not too much work to put together a garden for "them" to work on now. Sowing the seeds of the future generations does matter. What will happen to human kind when our food supply is only mass produced and then distributed to us by others? Do you know history? How many people have starved to death on societies like that? They need now the skills that could one day keep them, and all man-kind, alive and healthy. They need to be able to make intelligent decisions about their own food and their future. No food, no future. It's kind of important.
Whether you're looking to go green, eat healthier, or avoid chemicals and harmful things in your diet, you can do it with "them". I challenge you to place a seed catalog in front of a child today and ask, "So, what would you like to grow?" Just watch their gears start turning, and see what ya'll can do together this year that will last for years to come. They are the future of our food supply! Give them the tools to grow into the creative, doers of tomorrow. Then when the harvest comes in, load up the tuck and take 'em to the local Farmer's Market to reap what they've sown. I want to encourage you to, let 'em get dirty and "Get out and grow together!" 
Can I eat this one? Pleeeease!

To nursery rhyme tune, "This is the way
we sow the seeds, sow the seeds, sow
the seeds."
Look what's for dinner!
6 yr old Seed Saver
What kind of chrysalis is this?
We ended up with about two hundred
African Horned Jelly Melon. They are
very, very thorny.
To harvest, USE THICK GLOVES!

Growing "them"

Tuesday, December 30, 2014

Grow'n Greens & Purples with "them".

One way to save money and to expand the vegetable horizons for little ones is to grow some cool looking things they have never seen before. I love getting out with them and even when it gets cool, you can grow some really neat greens or purples. In the south some things pose more of a problem to to grow in our weather and soil than others. If you can't grow anything else, you can grow some Turnip Greens. My cousin said she could throw 'em straight out in grass and they'd grow through the winter. Many folks have told me the same thing, though I've never done it. I know hunters do Kale that'a way. So here's to getting their vitamins down one trick at a time. Let them grow them themselves! They love it and with something so easy as Turnip Greens, you can't hardly loose. They're not only in green though, many varieties of greens also come in purple or a red-ish color. No edible bulb like the turnip though, as most are mustard varieties, but some good eat'n none the less. How many kids out there are going to be so eager about another serving of green junk that looks just like the last (cooked to mush) put on their plates? So this go round I tried to throw in some purple ( called Japanese Red ) mustard greens and it was so much fun teaching them about the B vitamin content and all those greens have to offer.
For those interested in a basic turnip green how to, here's an easy recipe from my Granny (with healthier options) for some "real southern greens". Serve up with a mess of cornbread and Viola! First, salt down your greens in cold water if they just came in the house, this brings all the little guys (bugs) to the top or out so you'll be able to wash 'em clean. Next, let 'em soak a few minutes. This feeds 8, so decrease if you need to. Then rinse real good, tear apart with your hands and fill up a big ole crock pot till its full. If you got 'em, add turnips. Drop a few teaspoons of Lard, or Coconut Oil in to help mellow flavor. Add about (she never measured a thing) 1 Tablespoon Paprika, and about 1Tablespoon Cumin. Next add about 2 Tablespoons Sea Salt, a pinch of black pepper and fill with water to the top to cover greens. Turn on high, and watch. They will cook down after an hour and you'll need to add more. I usually add the second time, as much as I put in the first. They cook way down like spinach. Let cook all afternoon and fix up some skillet cornbread to go with it. Enjoy with "them"!


Remove all the little friends first.

Catch the little guy on the rim!
Then add salt and oil or lard.


Grow'n Together

When they participate, they feel important.

Yumm!

Monday, October 27, 2014

Make Your Own Natural & Organic Lip Balms!

It's just in time for gift giving and very inexpensive to make your own natural lip balm. You can even make them look really attractive with making your own labels either at home or ordering from places like vista print! It's easy, fun, and handmade. I really appreciate handmade gifts because I think about the time and effort someone put into vs a quick buy at the store. Handmade gifts seem to convey more of the "I care" and especially when the ingredients are the best nature has to offer. Sorry, direct links I cannot do, we live in a very rural area and have no internet access except phone, so I will just put up web address. Also I personally shop around for my butters and oils so I can get the purest Organic, if you want all Organic ingredients look at Amazon, you can find it all in Organic there. My suppliers only sell bulk. If this is a first time for you trying to make your own body care, I would use items from the store or wholesalesuppliesplus.com as this will keep your cost down incase you mess up. Then once you've got it down try buying the Organic ingredients. If it's  not a concern the following oils and butters can be gotten either at the grocery store or wholsalesuppliesplus.com
So here it is, you will need:
A very small beaker, that measured ounces and 1/2 ounces (from Walmart)
2 metal sauce pots, one to melt in and the other to combine oils and pour from so a pour spout on the edge is helpful.
24 Lip Tubes .15 oz ( from wholesalesuppliesplus.com ) They come in round or oval.
Lip Tube Holder, very helpful. Made of silicone and holds little tubes still while you pour warm liquid. Make sure you get the right shaped one for your specific lip tube, round or oval. ( from wholesalesuppliesplus.com )
Mango Butter 1 oz ( from wholesalesuppliesplus.com )
Coconut Oil 1.15 oz ( from grocery store if, not needing bulk amount )
Safflower Oil 2.40 oz ( from grocery store, if not needing bulk amounts )
Bee's Wax 1.75 oz ( from wholesalesuppliesplus.com )
Peppermint Essential Oil ( from wholesalesuppliesplus.com or for Organic try mountainroseherbs.com )
To begin, place all your tubes in holder and sit on level tray that can be moved to frig when done.
In melt pot, place 2 Tblspn Mango butter, melt on medium heat and pour into beaker, should measure 1 oz. If over pour extra into dry bowl to cool, if under add some to make 1 oz. Then pour that into combining pot. Next melt 2 and 1/2 Tblspn Coconut Oil and measure in beaker to 1.15. It's slightly over 1 oz. Pour into combing pot. Pour Safflower Oil into beaker and measur to 2.4 oz. That's just before the 2.5 mark. Add to combing pot. Scoop up bees wax beads and measure to 1.70 oz, and add to combining pot. Slowly warm over medium heat until all is melted together. Turn stove off. Pull of eye and let rest until it isn't so hot. If it's too hot you burn up essential oils. They are very sensitive, so wait just about two minutes. If it begins to firm up, just rewarm. Then add 3/4 teaspoon of Peppermint Essential Oil to the pot, stir and pour quickly into tubes. If you need to move out of the way do so very carefully. I would advise putting into frig to help cool down until firm. Then you can just pop off of holder and place cap on! Now your ready to label. I hope you found this helpful.


Sunday, October 19, 2014

Fall Fertilizing with "them" & Breakfast for the plants!

Fall is THE time of year we fertilize by several ways. Manure tea, maure, lime from the feed & seed,  compost, burn old garden plot or old wood & plants (fungi ridden tomatoes) in garden, and breakfast for the plants are all on the list of possibilities. It's also a great time of year to weed. It's not hot outside and work seems nicer out doors. Not to mention prepare trees for up coming winter. I believe most people fertilize in spring not thinking of long term. As a result some miss out on bettering next years crops. I do everything with 6 in tow and teach as we go. I want them to know hard work, and eating the fruits of your labor! I also want them to have skills so many of us are working to reclaim. As far as fertilizer we mainly make up this "breakfast for the plants". I use it on everything I can. Here is the recipe. Egg shells dried in greenhouse, then powdered. About 3 dozen shells. To this add about 6 Cups Oats powdered, 4 Tblspn Coffee Grinds. If using old & used, dry them out and dump about 1/2 Cup worth into mix, 1 Cup of Epsom Salts and 2 Cups Sugar. This goes everywhere! It can and does go on fruit trees, berry bushes, even tomato and pepper plants. It can also be used on flowers and herbs. Since melons and squash are finicky, use very lightly.
We have to weed our winter garden before we can fertilize it or we're fertilizing the weeds. Since we also need to weed around the seedlings we just planted and the tillers are NOT working, we just get at it with the hoes and in just an hour were done. Everyone wants to help. It's just totally natural and fun to see what a little work can do.
   If you need a stronger fertilizer, which I do recommend to first time gardener's or those who do not have the soil built up, go ahead and use 13-13-13, sparingly. I am phasing this out slowly as I am trying to go more Organic. But it takes a couple of years to get things in that direction. Gardening is really easy and fun with "them". We go at life differently and LOVE IT! I get "them" involved and most of the time they are asking me "Can I hoe? Can I save these seeds? Can I spray? Can I plant this row? Can I do the fertilizer? " Sure can!
   As for trees or bushes affected by worms or mites, I would put a coat of grafting compound at the base of the tree to winterize and again in spring. It does help with that worm/borer that's drills into your fruit trees. And then all you see is a dead tree and stuff oozing out. Remember to add 1/2 to 1 Cup of Breakfast to each tree at the roots by digging up a bowl's worth of dirt and working back in with breakfast. Use on each bush or tree and water.
powder eggshells

add oats


Little brother wants to be like Bubba'.
So sweet!
Put out a cup every so often and work into soil
around berries and trees.


Monday, October 6, 2014

Putt'n up Pears with "them"

What do you do with a lot of pears and a lot of "them"? Pass out peelers! So we just enjoy each other's company, talk, laugh, and peel them pears. I keep it simple, so as not to make it to hard. We'll  can 'em, eat 'em, share with the animals, and the rest go in soap. I get the ideas for my natural body products right from nature. And using what we have right from the homestead gives me lots of creative products. For all that we create visit, HomesteadMoma.com
   We laugh and joke, that helps the time go by. Sometimes we have the oldest read a book aloud while everyone just listens while working. We've worked through many a novel this way. Books I never would have read, now I know, thanks to times like this with "them". I love these times. Working together, enjoying each other's company and teaching "them" a simpler way of life is all worth the work. Then, how fun it will be to have something to remember/eat come winter; a healthy food they helped with. We're putt'n up more than pears, we're putt'n up memories.


Easy Homemade "Hot Cross Buns!"

Well, here's our way to make homemade bread, step by step! This is our go- to bread for everything. Rolls, pizza dough, loaf bread, you name it. It's an all around great bread recipe. Easy how-to instructions makes it a snap. And if it takes you a while to get it down, no sweat. It took me about a while to perfect the recipe and open the oven to rolls, not bricks.:) One note: we mix the wheat flour with King Arthur for two reasons; King Arthur Flour is not bleached or bromated or enriched (that means they don't 1- bleach it, 2-microwave it to kill bugs, 3-add chemical vitamin replacements) and  it gives the bread the lightness and elasticity that it needs to rise. We use ground red or white wheat for the other half.
    6 1/2 cups of flour (mixed 1/2 King Arthur white & 1/2 wheat)
    2 1/2 cups of warm water
    2 tablespoons of yeast
    1/3 cup either honey or sugar
    1/3 teaspoon of salt
    3/4 cup of Safflower oil
    Note: we use a Kitchen Aid Mixer to cheat on the kneading process.
Put the flour and salt into a mixing bowl.
Measure the yeast into a ceramic bowl and add water on top. Then add sugar to the yeast bowl.
Mix the flour and salt together, then make a well in the center. After the yeast has had about 2 minutes to settle, pour the oil into the well, then the yeast water. Do not mix!!!
Put the mix into the mixer, or knead by hand until the dough is good and evenly mixed. It should be not too wet, but if it's a little sticky then that's okay.
Oil a ceramic or plastic bowl and then turn the dough around a few times to coat. Cover with a towel and let it rise in a warm place for 45 minutes.
After 45 minutes, divide the dough into a little smaller than roll size portions, because they rise a little bit. Shape by flattening with your hands, then pinching the edges under like you're making a mushroom top. Put the dough on a cookie sheet, or a pizza stone for the best results.
Let rise another 25 minutes.
Cook in a 400 degree oven for 25 minutes, maybe a bit longer according to your oven, then when they come out brush them with oil or melted butter. Viola! Homemade bread couldn't get any better!!


Friday, September 19, 2014

How we never get tomato worms!

How does a family that grows an enormous amount of tomatoes not get tomato worms? Simple, marigolds. Well, we might have found like two each year. We just put a few marigold seeds between each tomato plant so that when tomato season is over, there is still a sea of marigolds left for table bouquets. Not even a dime needed to get them going after the first year. That first year you buy a couple of packets and after that there's plenty of dead heads to save from. Just remember to get the dead heads, those have already been pollenated by the bees and butterflies. So simple! Its also a very easy way for little ones to get involved in the gardening process. They can easily pull apart dead flowers to save seeds for next year. Then place on cookie tray to dry out for a day or two. Jar and keep in a cool, dry place until next year.  Get out and grow together!


Thursday, September 18, 2014

1 Hour A Day May Keep Hunger Away

 What if you could make an investment for your family's food future so that in a time of need, such as a disaster, power outage, or such you would not be stuck having to do without. Or worse!  Remember hungry people don't always get along. What if you could spend a little time investing not only in your food future, but in the next generation. (See: Planting Fall Garden with Them).  Last week we spent 1 hr toward growing greens, lettuce, beets, kale, spinach and carrots. Dad did till up ground, but after that we spent only about 45minutes to 1hr putting out the seeds of knowledge, bonding, learning and love. Here we can see already the sprouts of a fall/winter food source. Carrots grow really well in winter here in the south. They won't be ready until early spring. Summer in the south is sometimes too hot for them, so we plant in fall. We can start pulling them up come Febuary/March. All for pennies on the dollar.
Saved seed and grew herself, 5 yrs.

   Even in the city, a container garden could be reseeded every two weeks, and a few lettuces with herbs will give you more healthy and yummy choices. Or plant eatable landscape like blueberry and cherry bushes. Where else could you save a buck and benifit from it in other tangible ways? Where ever you are, you can do something. For those parents out there, it's about teaching your children to be capable independent "doers." It's a lot more fun for them to participate in life than to simply be a watcher. This is one big way to build confidence. Think of all the common knowledge our grandparents had that we don't. So if we want the future to be a brighter place, it's up to us to invest in it. Plant seeds today, eat tomorrow, as in food or knowledge. Hands on, working with "them." It is really worth the work. After a while of trying new things, they don't even see it as work, but just part of the day. When we planted our fall garden the children asked "me" if they could hoe. I just got started and they fell right in wanting to help. They get more excited about looking to see if their hard work is paying off. They need/want challenges with you! Unlike sports, after the labor you get to enjoy the reward with those you love, save money and "eat the fruit of your labor." So go on, "get out and grow together!"
Before
After 1 week and a good rain.

Within a few weeks, you have a harvest!


Monday, September 15, 2014

Affordable Garden Fresh Pizza with "them"

Summer is over, however; there is still a produce section at the grocery store. One of our favorites is to make homemade pizza together on Friday night. So after pricing it up and considering the "health food" aspect of it, I though it might be worth sharing. In the summer we eat a lot from the garden, which means mostly free, minus sweat equity and a little $. But even buying all the ingredients you can do soooo much better making your own food than buy "convenience foods". You must be willing to "do" a little work. And that means move your rump off the couch, but it is worth it for your pocket book, your health, and for "them". I really do believe the best option, that really IS an option to most of us is to grow what we eat. It is hard, time consuming and requires you to "do" something, but it is worth it. Your health, your family's health is all at stake. But this recipe can be used for anyone who wants healthy and affordable even if you don't grow a garden.
   This recipe feeds 8 people, and so if you're only feeding say 2 or 4,  half or quarter it as suits you. I'm going to itemize for you here so you will see the value of it. It's also soooo much easier nowadays with all the new kitchen equipment most of use. It's not so time consuming. It takes 30min to prepare and 20-30 min to cook. And there's enough for everybody to have average of 3 big pieces. But little ones won't eat but 1 or 2.
   Crust: 6 Cups flour ($1.50), 3/4 Cup Safflower Oil ($.75), 1&1/2 Tblspn Yeast ($.10), 2 Cups warm water free. Mix in blender, until looks like dough. To stiff add water 1/4cup at a time, too wet add flour. Eyeball it till it looks right.
   Topping: Veggies 2med sized Squash ($1.50), 2med Zucinni ($1.50), 1 Onion ($.50), Handful of Peppers ($1.00), 1/2 Cup Safflower Oil($.50). Cut up veggies and sautée in skillet just until there not quit so hard and crunchy.
Cheese: This is "The Best" Cheese with No Hormone Use! Joseph Farms It comes in a 4 lb block ($15.00). Shred 1&1/2 lb. ($5.62).
  Sauce: home canned tomatoe sauce ($.25) or ($1.00) store bought, with pizza herbs for seasoning ($.25) or free if you grow 'em. Ok so the cost for feeding a family of 8 two big veggie pizzas is ( if it were my Husband he would figure in energy use and gas to the store :). But anyway, all items bought Total =$ 14.47 Half it for feeding 4 and you've got $7.25. "What !!!!"
   Yep, now lets see what it would be if you grew most of these things, what that might look like. Minus cost of Peppers, Onions, Squash, and Zucinni, and canned tomato sauce, your looking at $9.22 for 8 people or $4.61 for 4 people. That's $ 1.80 per person if it is all store bought or $1.15 a person if you grow it your self. WOW!!!!! Verses the mystery meat, cheap-o hotdog & chips at an average of $1.75 a person. With nothing but dog, bun, and chips. Come on!!!!! So not only can you eat healthy on a dime you can do it with the ones you love. "Get out and grow together!" Then make pizza :)


Thursday, September 11, 2014

Yogurt making, the easy Homestead Moma way.

   This is so super easy that my 6yr old begged to be our in house yogurt maker, and loves the job. We could'nt be happier. Homesteading skills are not all hard, or I would not be doing them. Grab your little people and "grow together", in this case it's probiotics. Teach them this one easy trick and you'll have it made. It really takes 10 minutes to put together. Oh and please don't waste your time telling me, it might not be safe because you aren't using proper ($200) equipment. I like doing things the old fashion way, so thanks but we've done it like this for years. If it's bad, it's because there is bad Milk used, and you'll know it by the look(like cheese) and smell. Yogurt smells a little sour anyway, so you know it's bad when it really WREAKS! Very rarely does that happen. And again do you know your milk source?
Things Needed:
Pint or Quart Jar (must be glass)
Yogurt (I prefer/like Greek) when$ will allow
Milk
Sugar or Honey
Just place 1/2 Cup of your yogurt of choice into a pint jar or 1Cup into a quart.
Top with 2 Tblspn Sugar or Honey for pint, 4 Tblspn for quart. Top with milk.
Put on lid, shake VIGOROUSLY. To evenly disperse among milk. It may have clumps at the bottom of jar and not make as well if it's not mixed in good. Then simply place outside in a sunny spot. The glad will make a greenhouse/solar cooker for it and Viola! It's done. Really were all those gadgets to "make yogurt" used 100 yrs ago? No! So let it sit all day and at nightfall you'll have yogurt. If not, let it sit another day. The idea is to let it incubate or grow the good bacteria. And needs a temp in the upper nineties for about 12-18 hrs to do so. Don't put it out in the daytime(afternoon), because it's not getting all day sun. Don't start after say 12pm noon. Unless it's pretty warm outside. If you need to make with "them" in afternoon. Just put out next morning. If it is real hot and sunny, 90 degrees or more, put in a place that will give some shade/some sun. 1/2 and 1/2. You'll know it's done when it pulls away from the jar in a solid clump, or has the thick look of jelly. It can over cook. So watch it. Or if it's fall and cool outside, place in front window of a car that does not have tinted windows. Free solar cooker! I have mine here on the greenhouse shelf, and just left doors and window open to prevent overheating. Trick here is it takes getting direct sunlight! If your greenhouse is not translucent put in full sun. Like now in the fall, I'd do full sun on a piece of aluminum foil to help heat rise temp. ***Or place in oven with light on, and oven off. Another option is place in crockpot alternating between warm and off through the day. Idea is to keep warm. Once gelled, refrigerate and reserve a small amount to do again. If you can keep it going, it's like sour dough starter. In this manner you won't need to buy yogurt, at least for a long while.
   Occasionally it can go bad, but if it does it's because you've got bacteria in your milk. IE. Bad Milk. Yogurt is a natural process, like cheese of the good bacteria growing and "contaminating" the whole container of milk. If you end up with something that smells real bad, IT IS! It should not have a "cheesy look and smell", like a baby bottle that was left in the car on a hot day. Dump it and try again. It only costs pennies to do this anyway. In fact when these pictures were taken we did 2quarts and 1pint, and we saved about $15 in what we would spend at the store for that much yogurt.
  ****Homemade yogurt is a little runny because you don't add in all the "unhealthy" additives to thicken it up. Just put into frig till good and cold. A couple of hours. Just hold with spoon or cheese cloth and pour off whey to get the liquid off, if you would like. I usually don't bother. Also a good Greek yogurt to use as starter produces a better, less whey containing, end product!!! I don't mess with pouring of any whey when using a good Greek type to start with. When pouring off whey, easy or you'll loose the soft yogurt. Mix, and keep in frig. Throw in some fruit and it is soooo good! Happy "growing bacteria together".
Add Yogurt, milk, and sugar.


Lick spoon!


Shake well.
Let sit in warm spot 12 to 24hrs.

Wednesday, September 10, 2014

Southern Fried Green Tomatoes-Double Dipped!

One of the first things we love to do each spring is make fried green tomatoes, fresh from the garden. It is really rewarding when finally all the planting, hoeing/tilling, weed picking, and fertilizing bears good harvest. All that hardwork is laid out for you to enjoy and it is good! We don't eat a lot of fried foods, and when we do we use Natural Oils, "God Made". No hygrogenated or chemically processed. Organic if possible, but not always. $$. Also NO Canola, Corn, Cotton or Soy Bean Oils. All are mostly GMO. I don't believe man has the right to alter what an All Knowing & Perfect God originally designed. It's like waiting for a bomb to go off. Now through time, medicine, and science we have seen more gut issues, immune issues, and allergic reactions then time past. Well doesn't that say anything to us? I'm just saying, He either knows what He's doing and can do it right the first time or He clearly has made mistakes in nature and needs us (man) to correct His errors. Ummm so, if you reap what you sow, where does that leave us? SICK. How many times did the children of Isreal say, this is not good enough? Manna, meat, ect... So now our idol of convience has given us a harvest of disease. If it (plants) have been altered now to contain pesticides to kill pests when they eat of it, what's that going to do to you? Come on people. You will reap what you sow! With that said here goes our simple and delicious version of Fried Green Tomatoes, Double Dipped!!
   You'll need: nothing measured, we use the eyeball it method
however many green tomatoes you think to feed your crew
In first bowl- flour mixture
A few cups Flour (wheat works best)
About a cup cornmeal
Tblspn Sea Salt - this is God made and will not increase blood pressure
Tblspn Garlic
About a teaspoon blk pepper
Mix all up real good
In second bowl
A few eggs with about 2 cups water
Mix up real good
Pour your oil into skillet to be heating up and while your making up tomatoes. Slice up tomatoes and 1st dip into egg mixture then 2nd into flour mixture, then real quick do over again. Make sure batter doesn't come off on hands, BE QUICK! It is messy but worth it.
I use either Safflower or Coconut Oil and Organic if I can afford it. Drop into skillet and turn when golden brown. When cooked on both sides lay on paper towel to dry, and Viola! The best fried green tomatoes you'll ever have.